Gecko Out Level 169 Solution Walkthrough | Gecko Out 169 Answer
How to solve Gecko Out level 169? Get step by step solution & cheat for Gecko Out level 169. Solve Gecko Out 169 easily with the answers & video walkthrough.


Gecko Out Level 169: Board Layout, Rules, and Win Condition
What You’re Dealing With on This Board
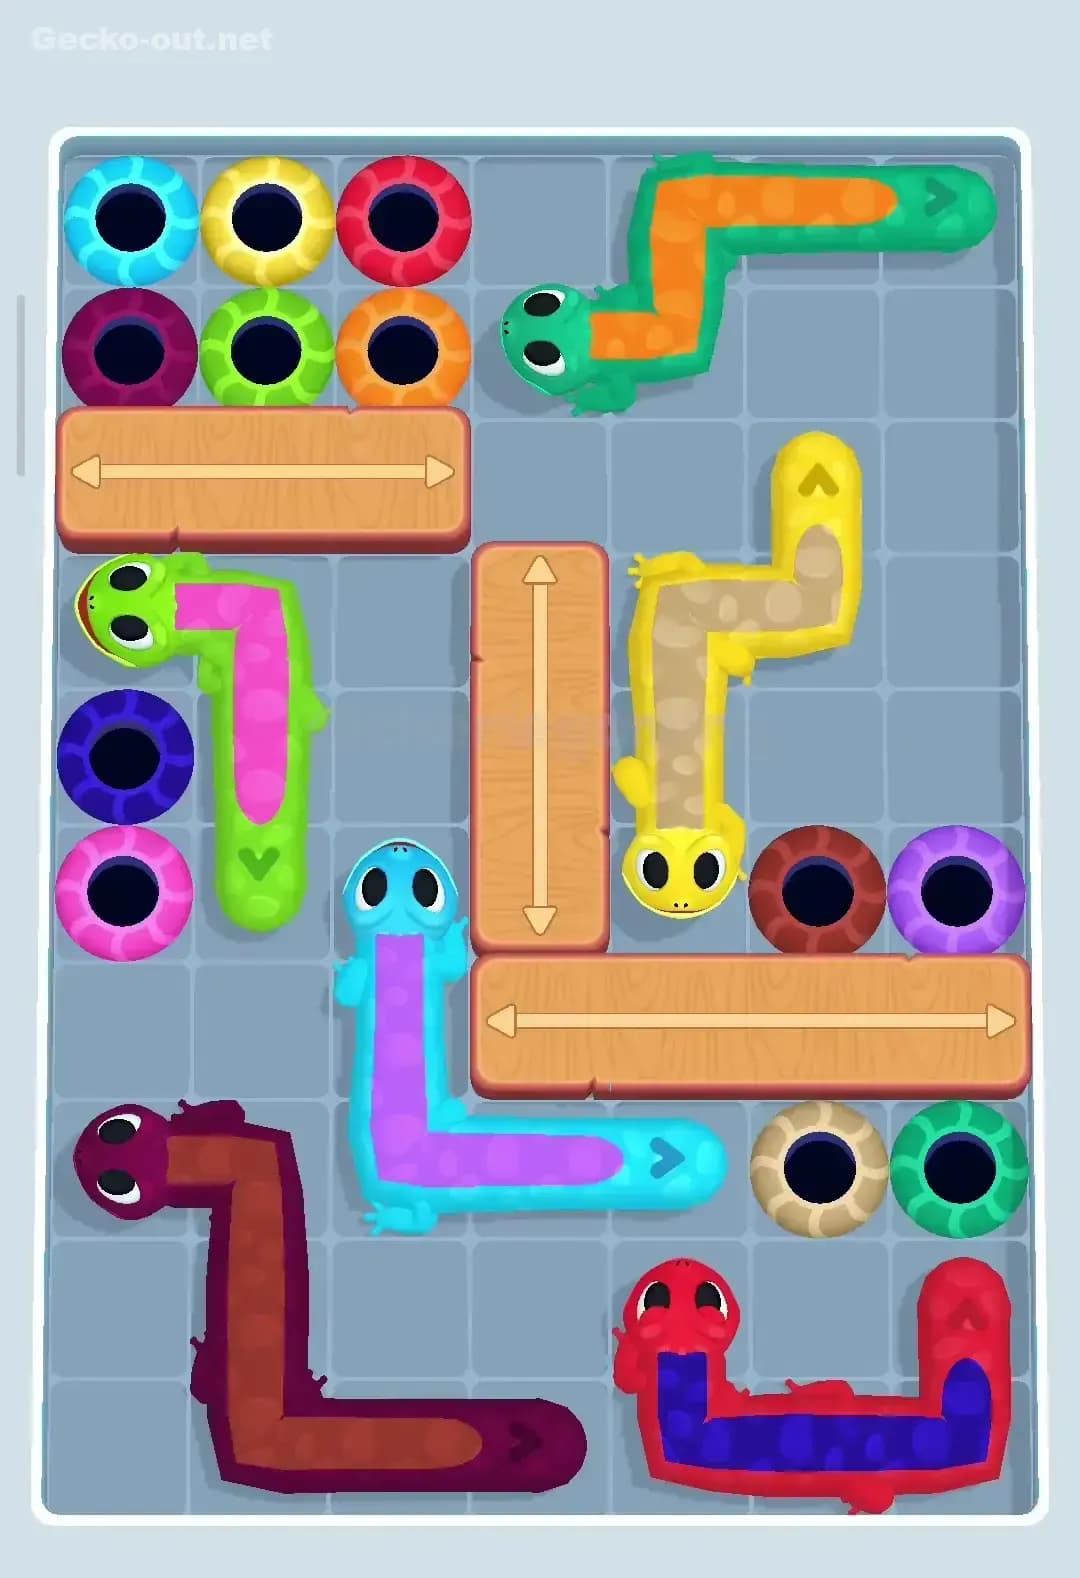
Gecko Out Level 169 drops you onto a cramped, icy board with a lot happening at once. You’ve got a mix of free geckos and frozen ones: a long orange gecko and a pink gecko stretched along the bottom, a short green gecko just above them, a horizontal red gecko across the middle, and a purple–blue tangle in the top-left. On top of that, two vertical geckos are frozen into ice columns on the far left and far right, waiting to be thawed and dragged out.
Exits are scattered: a row of colored holes across the lower-middle, plus extra holes near the top corners. Several exits and paths are wrapped in ice or blocked by colored blocks, so you can’t just draw the most direct line. In the very center sits a band of grey tiles with “15” on them plus a row of numbered colored circles above them. These are your warning tiles: once the timer hits those numbers, they turn into extra holes that can completely slice the board in half if you’re still trying to cross. There’s also a red X switch and a striped horizontal gate that controls access between the top and bottom halves of Gecko Out 169.
Why the Timer and Pathing Make This Level Spicy
The win condition is simple on paper: get every gecko into the hole that matches its color before the global timer runs out. The twist on Gecko Out Level 169 is that path-drag movement and the timer are tightly linked. Every path you draw becomes the exact body trail, so any panicky zigzags not only waste time but also leave long, snaky walls in terrible places. Meanwhile, the warning tiles and numbered ice blocks mean you can’t delay in the center—if you’re still crossing when the “15” and mid-row numbers expire, you’ll be locked out of key exits.
So the real puzzle isn’t “how do I reach each hole?” but “in what order can I clear these geckos so their bodies don’t cut off future paths before the board changes?” Once you think about Gecko Out 169 in terms of lane control and timing windows instead of raw routes, it gets a lot more manageable.
Pathing Bottlenecks and Logical Traps in Gecko Out Level 169
The Central Timer Lane Is the True Boss
The biggest bottleneck in Gecko Out Level 169 is the central band with the 15-count tiles and the colored numbers 11–14 above them. This strip is the only comfortable passage between the bottom cluster (orange, pink, small green) and the upper cluster (purple, dark blue, frozen right-side gecko). For a while, you can drive through it freely. Once the timer hits those numbers, though, the tiles flip into holes or hard blocks and the board effectively becomes two separate rooms.
If you don’t pre-position the red gecko and don’t clear at least one of the frozen side geckos before this happens, you’ll find that the last two or three geckos physically can’t reach their exits anymore. That’s the classic “I had one gecko left and literally nowhere to go” failure in Gecko Out 169.
Sneaky Trouble Spots Around the Edges
There are a few nasty subtleties:
- The left frozen gecko and its exit share a narrow vertical tunnel. If you thaw it too late, getting anything else past that column becomes impossible.
- The right side has multiple ice tiles with numbers (6, 8, 10) that you naturally want to hit for safety/time, but if you park a body there, you’ve just sealed your final escape route for the pink gecko.
- The top-left purple–blue knot looks like the main problem, but it’s actually fairly forgiving as long as you don’t let those geckos sprawl across the middle lane.
The result? The real difficulty of Gecko Out Level 169 lives in maintaining clean edges and not overusing the central corridor.
When the Level Finally “Clicks”
My first few runs, I tried to brute-force the center: pull red out first, then shove everyone else through the gap. It always ended in a mess of bodies lying across warning tiles while the timer hit zero. The moment Gecko Out 169 started to make sense was when I flipped the mindset: instead of racing through the middle, I used early turns to create parking lanes at the very bottom and far edges, then only crossed the center when a gecko was actually ready to exit. Once you see that the orange and pink geckos are mostly “storage,” and that the red gecko is your key to the gate, the whole level feels less chaotic and more like a scripted sequence.
Turn-by-Turn Path Strategy to Beat Gecko Out Level 169
Opening: Clear the Bottom and Arm the Switch
- Start with the short green gecko in the lower-left quadrant. Drag its head in a tight curve into its nearby green hole, triggering the left-side ice number as you go. Keep the path hugging the left wall so you free space rather than clogging the middle.
- Use the space you just created to slide the long orange gecko along the very bottom edge. Don’t send it to its exit yet; instead, park its body flat along the bottom row. This keeps it out of the central lane while giving you flexibility later.
- Next, guide the pink gecko at the bottom-right up the right corridor, clipping the “6” and “10” ice/timer tiles but stopping just under the striped gate. You’re basically reserving the right corridor for your final passes.
- Now deal with the horizontal red gecko in the middle. Drag its head left, over the red X switch to lift the striped gate, then curve it up and back right so it sits poised near its red hole in the central exit row but doesn’t go in yet. Red is now ready to finish the level when you need it.
Mid-game: Free the Frozen Geckos and Keep Lanes Open
With the gate open and timers boosted, focus on the frozen vertical geckos:
- Your earlier paths should have cracked most of the ice around the left frozen gecko. Once it’s free, drag it straight down into its matching hole at the bottom-left. Keep the path tight on the wall—no loops into the center, or you’ll accidentally block the orange gecko’s options.
- Do the same on the right: use either the pink gecko (if it still has room) or a quick nudge from orange to finish thawing the right frozen gecko. Once it’s mobile, guide it down to its hole near the lower-right cluster. Again, hug the wall so the central band stays clear.
- With the sides under control, move to the top-left cluster. First, steer the short dark blue gecko into its nearby blue hole with a simple L‑shape. Then draw a smooth J‑shaped path for the big purple gecko into the purple hole, making sure you don’t drag its body back over the center row. Both of these should mainly use the upper third of the board.
By the end of this phase, you want only three geckos left: orange, pink, and red, plus a central lane that’s still mostly open.
End-game: Chain Exits Without Blocking Yourself
In Gecko Out Level 169, the last sequence is all about exit order:
- Exit the orange gecko next. From its parking lane along the bottom, curve it gently toward its brown/orange hole in the lower-middle. Avoid stepping up into the 15-count tiles; keep the path low. Once orange is out, the bottom is wide-open.
- Immediately send the red gecko through its central red hole. You pre-positioned it earlier, so this should be a short, clean drag that doesn’t touch any dangerous tiles. Removing red eliminates the biggest horizontal body obstacle in the middle.
- Finally, finish with the pink gecko. Use the now-clear right corridor and bottom space to weave a safe path into the pink hole in the lower cluster. If some warning tiles have already flipped into holes, curve around them instead of forcing a straight line—you’ve cleared so much space that you can afford a small detour.
If you’re low on time, don’t overthink these last three routes. They’re all short, and as long as you stay in your assigned lanes (orange low, red mid, pink right), you won’t cut yourself off.
Why This Path Order Works in Gecko Out Level 169
Using Path-Following to Untie the Knot
The plan for Gecko Out Level 169 works because it respects how bodies follow the path. By parking orange at the bottom and pink on the right, you create safe “storage rails” that never intersect the busy central band. Freeing the side geckos early means they leave along the edges instead of colliding with the mid-game traffic. Pre-positioning red near its exit ensures that, when the center is most fragile, you only need a tiny, controlled drag instead of a long snake that might cross multiple warning tiles.
Playing Around the Clock
Timer-wise, you’re front-loading the slow, thinky moves while the board is stable, then doing quick, short exits at the end. Early moves hit the numbered ice tiles (5, 6, 7, 8, 10) to buy breathing room, and you only cross the 15‑count lane when there’s a payoff—either freeing a frozen gecko or lining up an exit. That’s why Gecko Out 169 feels much easier once you commit to this order: the scary timers are mostly managed before you’re under real time pressure.
Boosters: If You Really Get Stuck
On Gecko Out Level 169, boosters are optional. I’d keep them as backup only:
- An extra-time booster helps if you like to pause and redraw paths a lot; use it right before you start freeing the top-left cluster.
- A hammer-style obstacle remover is overkill here but could clear a single annoying warning hole if you keep misrouting around the 15‑row.
- Hints tend to show safe individual moves, not the full lane strategy, so they’re fine to learn shapes but won’t replace the exit order above.
You absolutely don’t need any of these if you stick to the plan and avoid panic scribbles.
Mistakes, Fixes, and Logic You Can Reuse in Other Gecko Out Levels
Common Errors on Gecko Out Level 169
Players usually trip over the same issues on Gecko Out 169:
- Exiting red too early, then discovering the gate or lanes are wrong for the remaining geckos. Fix: treat red as a late-game finisher, not your opener.
- Letting orange or pink loop into the center, turning their long bodies into permanent walls. Fix: keep orange on the very bottom and pink on the far right until you’re ready to score them.
- Ignoring the frozen side geckos until the timer is low. Fix: thaw and clear both vertical geckos during the mid-game so they leave through edge lanes.
- Crossing the 15‑row over and over with messy paths. Fix: plan crossings in advance and make them as short and straight as possible.
- Wasting time redrawing the same gecko routes. Fix: if a move doesn’t clearly help an exit or free space, don’t make it.
Reusing This Logic on Other Hard Levels
What you learn in Gecko Out Level 169 transfers directly to other knot-heavy or frozen-exit stages: identify storage lanes for long geckos, free frozen pieces early along the edges, and treat central timer areas as one-way bridges you cross only with a purpose. Any level with warning holes or toll gates benefits from pre-positioning: move a gecko near its exit well before you actually send it out so that the final sequence is fast and simple. Once you get comfortable thinking in “lanes” instead of individual geckos, many higher levels suddenly feel less brutal.
Final Thoughts: Tough, But Totally Winnable
Gecko Out Level 169 looks overwhelming at first, with timers everywhere and geckos packed into every corner, but it’s far more about planning than speed. If you open by clearing the small green gecko, parking orange and pink, freeing both frozen side geckos, then cleaning up the top-left pair before finishing with orange → red → pink, you’ll find the level falls into place. Take a moment to read the board, commit to your lane plan, and you’ll beat Gecko Out 169 without burning through your boosters.